 Google Play
An old map on your phone screen does not start on the phone. First the sheet has to be found, then matched to the ground, and only then taken into the field. That used to cost an evening: archives in a dozen tabs, the scan in one program, the georeferencing in another. The Discovera Historical Map Studio puts the whole path on one computer screen: finding a sheet, pinning it with points, a finished map for the app.
This article is a working manual: what to click, which landmarks to choose, and how to tell that a sheet sits honestly rather than just prettily. The reasoning behind overlay checks is covered in “An old map over the satellite view” — this one is practice only.
What georeferencing is and why you need it
A map scan is a picture. It has pixels but no coordinates: software does not know where north is or which spot on the ground a corner of the sheet stands for. Georeferencing means giving it several pairs of “a place on the scan — the same place on a modern map”. From those pairs the sheet is stretched and rotated to lie on the terrain.
Once georeferenced, an old map can be shown over satellite imagery, faded in and out, and it can carry your GPS position. Without it, the sheet stays an illustration.
What you will need
- A computer or laptop. Points are easier to place with a mouse on a large screen.
- A Discovera account — the same one as in the app. Coins, level and maps are shared between the site and the app.
- A clear idea of the place you need: the name of a town, village or district.
Searching for sheets, opening them at full size and georeferencing them is free. Coins are needed only for the last step — building the finished map.
Step 1. Find a sheet
Open the Studio and type a place name into the search: a town, a district or a region. The Studio searches open archives and libraries and shows sheets as cards: title, year, scale, a short description.
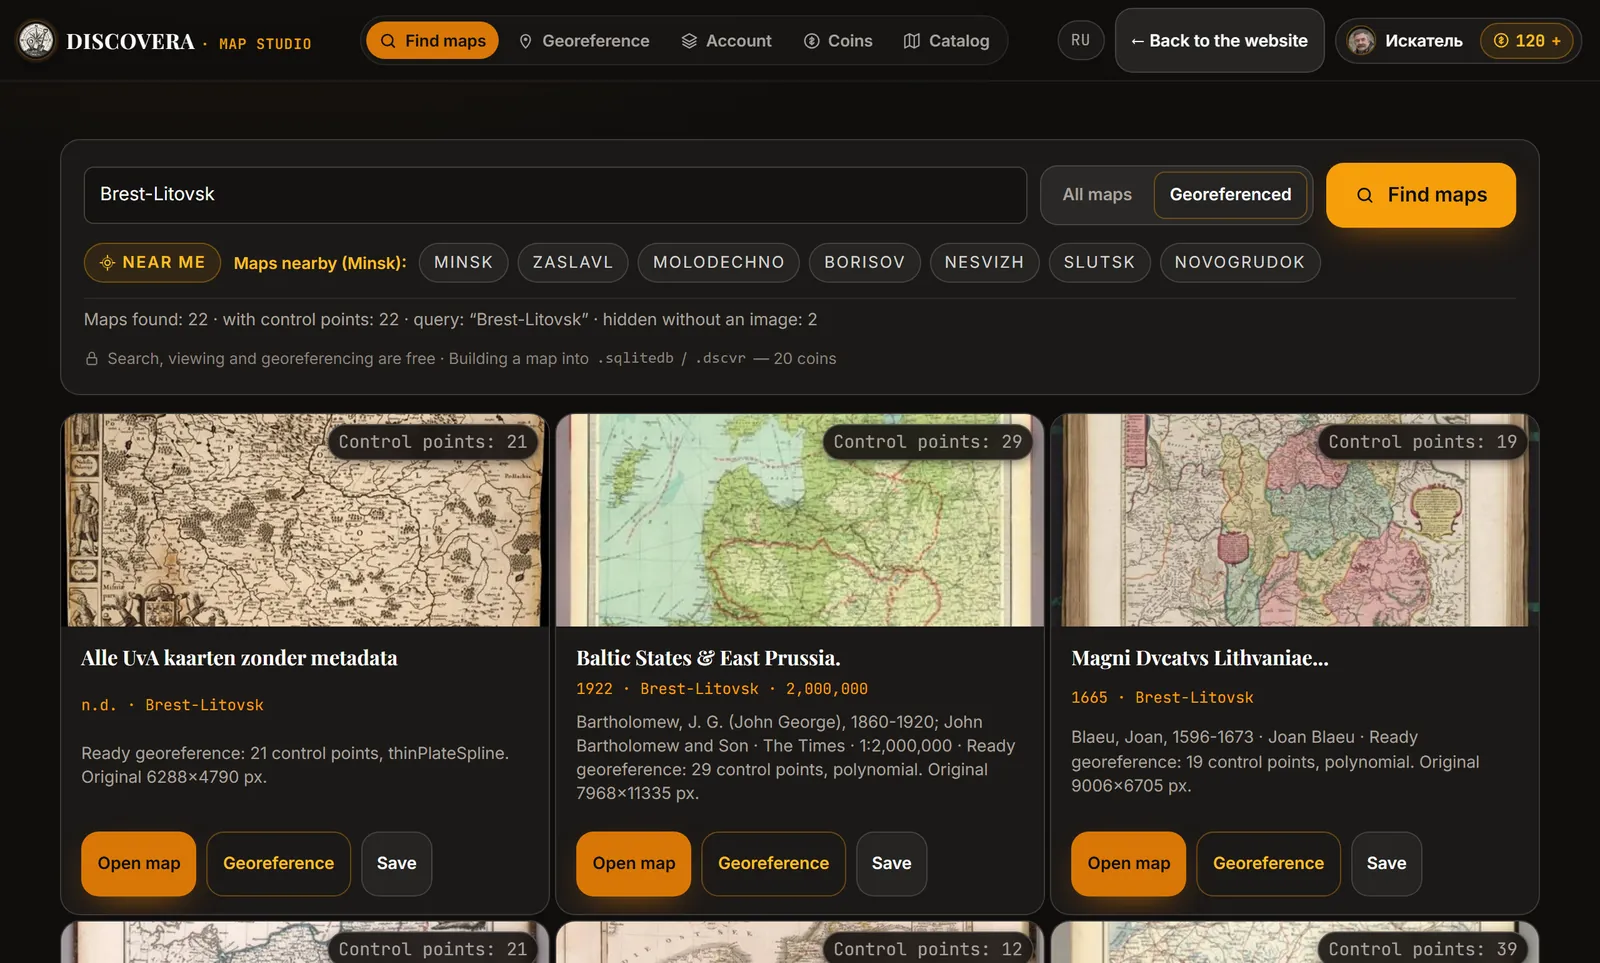
What to look at in the results:
- Year and scale. Fieldwork needs large scales: one centimetre to a kilometre or more detailed. A province overview will show where the highway ran, but not the farmstead.
- The “Control points” badge. If someone has already georeferenced the sheet, the card shows the number of control points. You can open such a sheet on the satellite straight away and check it instead of starting from nothing.
- The “Georeferenced” switch. Keeps only sheets that already have points.
- “Near me”. Suggests the towns closest to you if you do not know where to start.
Found several suitable sheets? Press “Save” on each, and they wait on your account page.
Step 2. Open the sheet and study it
“Open map” shows the whole sheet. You can zoom in and move across it as you would across paper: read the labels, find your village, make sure it is the right area and the right period.
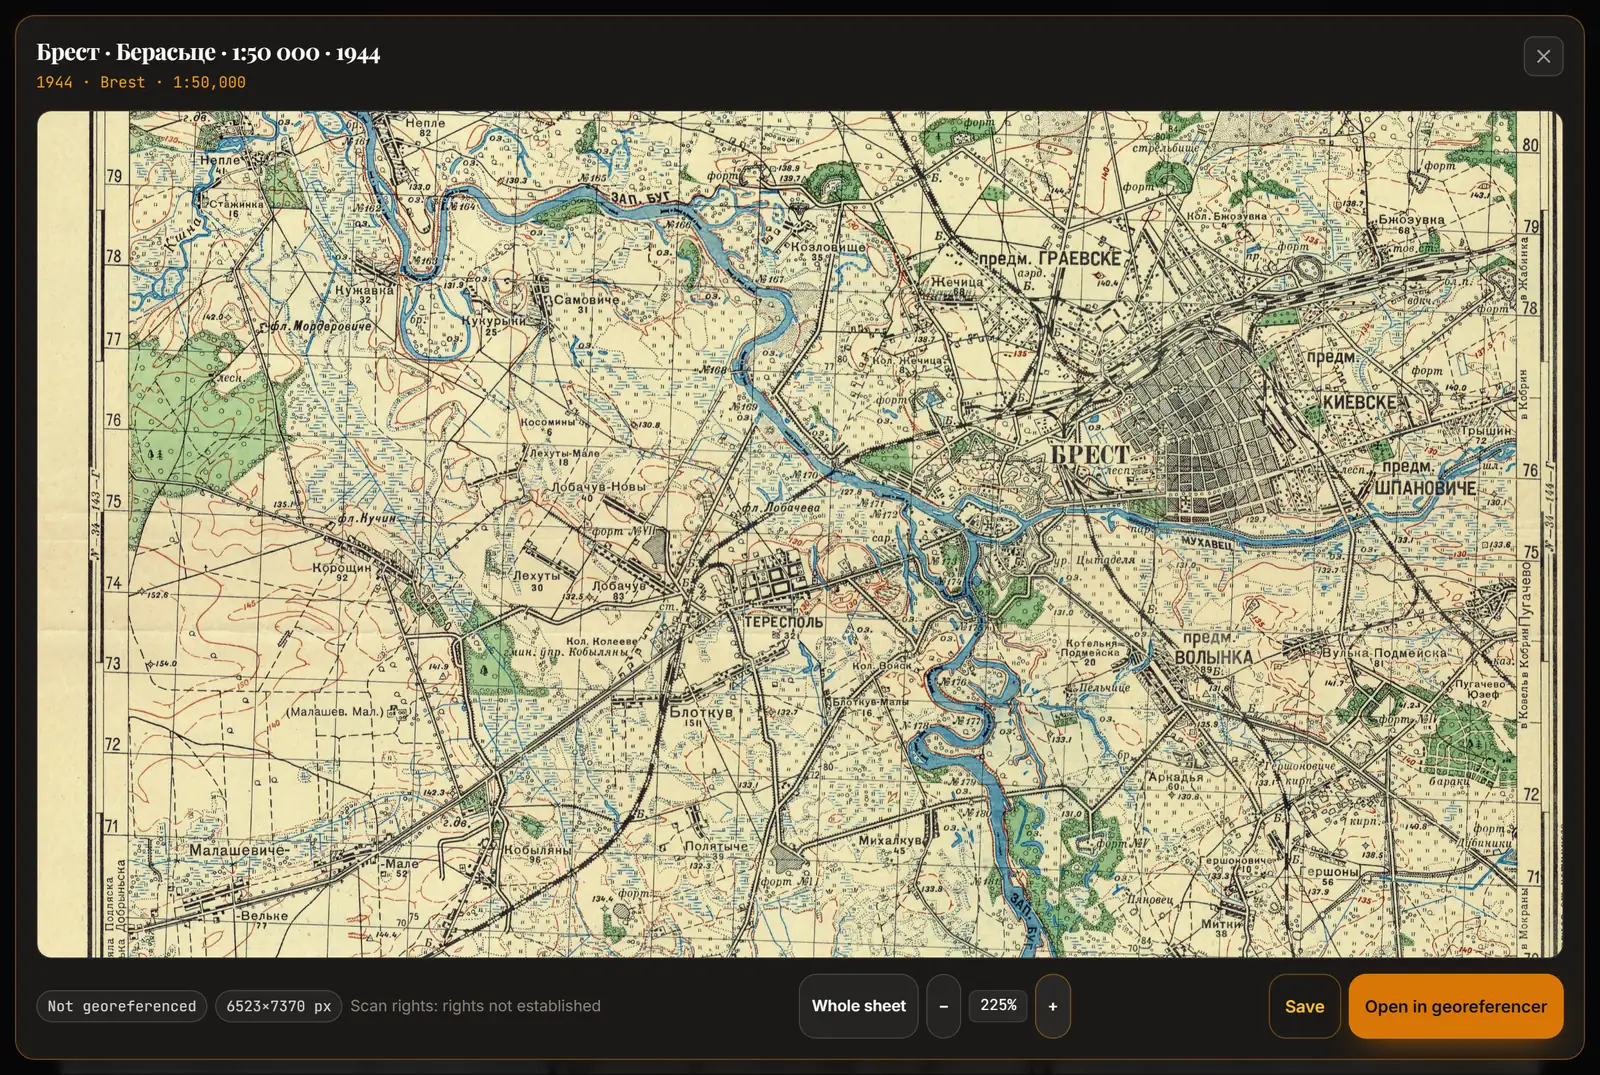
Below the sheet the Studio shows its size in pixels and the rights status of the scan. The larger the size, the finer the detail you will be able to read after the map is built.
Before georeferencing, find on the sheet the thing you need it for. If the place is missing or sits on the very edge, look for the neighbouring sheet. Reading symbols and labels is covered in “How to read an old map”; military sheets are discussed in “Red Army and General Staff maps”.
Step 3. Place control points
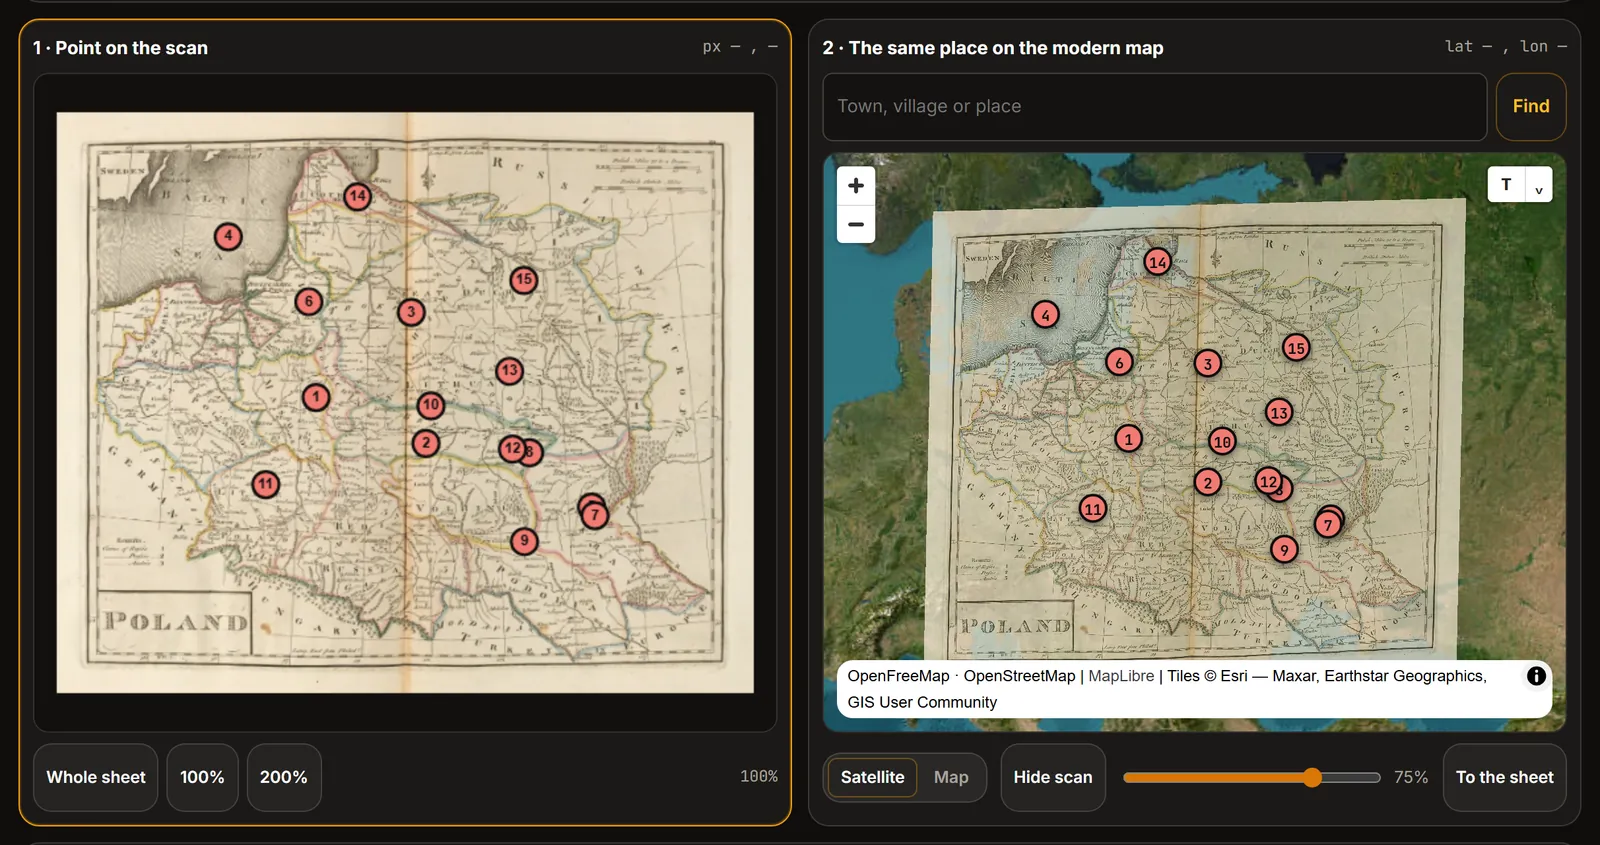
Click “Georeference”. The screen splits in two: the scan on the left, a modern map with satellite imagery on the right.
One point is two clicks:
- click a landmark on the scan;
- click the same place on the modern map.
To jump to the right area on the modern map, type its name into the place search. You can switch the base layer between satellite and street map: crossroads are easier to find on the street map, forest edges and river beds on the satellite.
After the second pair of points the sheet appears over the satellite. The opacity slider lets you look through it, one button brings the map back to the sheet, another hides the scan for a moment.
Which landmarks to choose
A good point is one that has not moved in a hundred years and reads unambiguously on both images.
| Landmark | How reliable | Why |
|---|---|---|
| A crossroads of old roads | Good | Roads in and between villages live for centuries |
| A church or a standalone stone building | Good | Stays put, and the map symbol is a point |
| A corner of a cemetery, park or estate | Good | Boundaries are stable and visible from above |
| A railway crossing or junction | Good | Track beds are almost never moved |
| A bridge | Careful | Bridges are rebuilt and shifted together with their approaches |
| A river bend, a lake shore | Poor | Channels wander, shores change |
| A forest edge, a field boundary | Poor | Changes within a generation |
| A town centre “by eye” | Poor | On the map it is a symbol, not a point |
How many points and where
- Two pairs — the sheet is already visible on the satellite, but it is only a draft.
- Three or more — the minimum for building a map.
- Five to eight, spread across the sheet, — a working set for most sheets.
Placement matters more than the count. Put points near the corners and edges, not in a cluster at the centre and not in a line along one road. A sheet nailed down by three points in one corner will sit perfectly in that corner and drift by hundreds of metres at the opposite edge.
Step 4. Check the accuracy
Below the maps the Studio says how many points the sheet is fitted on and what the accuracy is in metres. In the list, every point carries its own error — how much it disagrees with the others.
What to do with it:
- One point stands out. Most likely you picked the wrong landmark: a different crossroads, the neighbouring church. Select the point in the list, drag it into place or delete it.
- All errors are large and roughly equal. The map itself is probably inaccurate or the scale too small. An eighteenth-century overview map can differ from the satellite by kilometres — that is a property of the sheet, not your mistake.
- The error is almost zero on three points. It means nothing: three points always fit perfectly. Add a fourth and a fifth, and the number will start telling the truth.
A smaller error is not always a better map. Check with your eyes: move the opacity slider back and forth and see whether roads and rivers match where you placed no points. If the sheet behaves differently at the centre and at the edges, you will see it at once.
Press “Save” — the draft stays on your account page, and you can come back and adjust the points.
Step 5. Build the map and take it to the app
When you are happy with the fit, build the map. A build costs 20 coins: the Studio cuts the sheet into tiles and prepares a file the app understands.
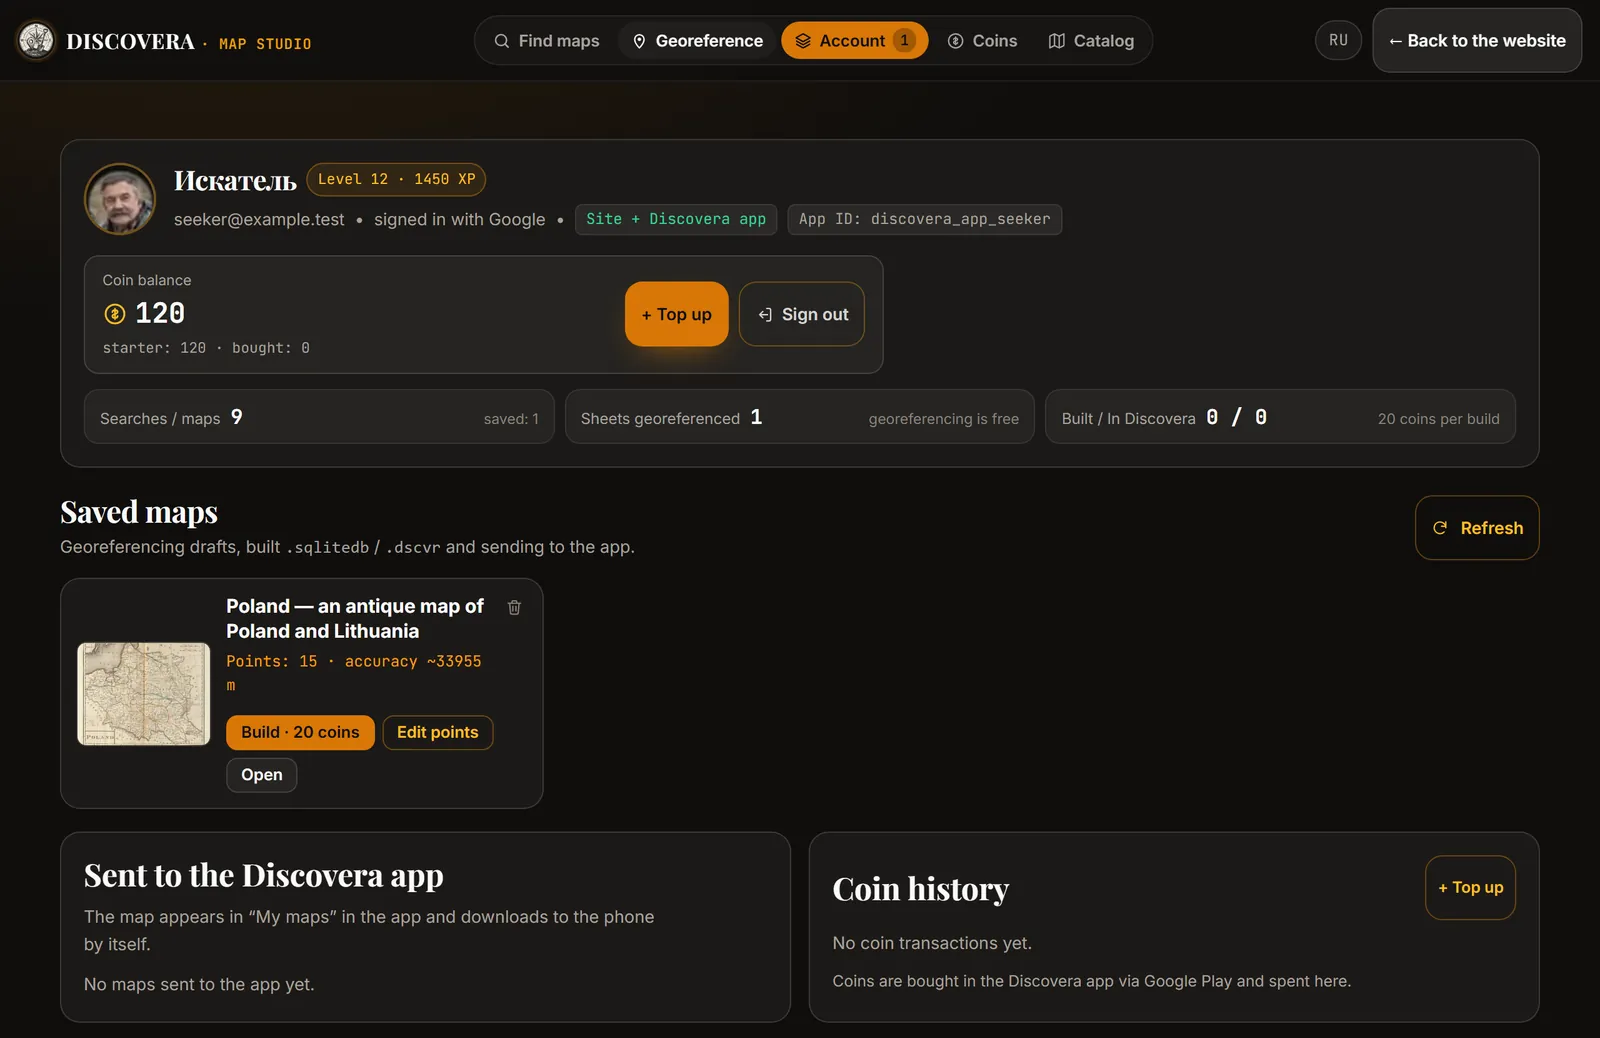
After the build there are three ways to go:
- Send to the app. The map appears among your Discovera maps and downloads to the phone by itself.
- Download .sqlitedb. A regular offline map file. You can import it into Discovera by hand: map settings → historical maps → import.
- Download .dscvr. A Discovera package: the map together with its control points.
The coins are the same as in the app, and the wallet is shared. A new account receives welcome coins — enough for the first builds. You can top up in the app through Google Play.
Common mistakes
Georeferencing along one road. Three points along a single highway define a line, not a plane. The sheet is free to rotate around it. You need at least one point far off to the side.
Georeferencing by a river. In a hundred years a channel can shift by tens or hundreds of metres, and at a small scale the river is drawn schematically anyway.
Trusting a pretty match. A road on the old map fell exactly onto the modern one, and it is tempting to call the sheet done. Check two or three more features in other parts of the sheet.
Too small a scale. A map on which a whole province fits in your palm will not show where the farmyard stood. For fieldwork, look for a more detailed sheet.
Leaving the check for later. Accuracy has to be checked before the trip. In the field you will have a phone, not two large windows side by side.
The Studio or the Georeferencer?
Discovera has two georeferencing tools, and they solve different problems.
| Map Studio | Georeferencer | |
|---|---|---|
| Where the sheet comes from | The Studio finds it | Your own scan |
| Account | Required | Not required |
| Where the file is processed | On the Studio server | In your browser |
| Ready control points | For some sheets | No |
| Sending to the app | Straight from your account page | By hand, as a file |
| Cost | A build is 20 coins | Free |
If the scan is already on your disk, open the Georeferencer. If you do not have a sheet yet and need to find one, start with the Studio.
Summary
Georeferencing is not a technical formality but a check of the source. While you look for the church and the crossroads on a sheet, you read the map more closely than ever. Five points at the corners, a pass with the opacity slider, an error in metres for every point — and what you carry on your phone is not a picture but a layer you can question.
A georeferenced map shows where things were. It grants no permission to search and does not change the status of the land: check the legal side separately — see “Metal detecting and the law”.
FAQ
How do I georeference an old map?
You mark several pairs of points: a place on the scan and the same place on a modern map or satellite image. In the Discovera Map Studio this is done in the browser: the scan on the left, the satellite on the right, one point is two clicks. With three or more points the Studio fits the sheet to the terrain and shows the accuracy in metres.
How many control points does a map need?
Three at the very least. In practice, five to eight spread towards the corners and edges of the sheet. On three points the error always looks like zero, so accuracy can only be judged from the fourth point on.
Is georeferencing in the Studio free?
Searching for sheets, viewing them at full size and the georeferencing itself are free. Building the finished map is paid — 20 coins. The coins are shared with the Discovera app.
What if the old map does not match the satellite?
First look at the error of each point and remove the one that stands out. If all points disagree at once, the cause is the sheet itself: a small scale, an early survey, paper distortion during scanning. Such a sheet is fine for the general picture but not for finding a particular farmyard.
Can I georeference my own scan?
Yes, with the free Georeferencer: the file is processed in your browser and is not uploaded anywhere. The Studio works with sheets it finds itself.
How do I open a georeferenced map on my phone?
The easiest way is to send it to the app straight from your Studio account page — the map appears among your Discovera maps. The other way is to download the .sqlitedb file and import it in the app: map settings → historical maps → import.
On a computer or on a phone?
Points are easier to place on a computer: two images side by side and a mouse. The Discovera app can georeference a scan too — handy when there is no computer around. Either way, the result has to be checked in the field, phone in hand.
What to read next
- An old map over the satellite view — why sheets drift, and seven overlay checks.
- How to read an old map — symbols, labels and abbreviations.
- Red Army and General Staff maps — nomenclature, grids and accuracy of military sheets.
- Terrain on an old map — relief, water and roads as landmarks.
- Archives of Russia and Belarus — where to look for what is not online.